Garlic Butter Zucchini Skewers Recipe
Introduction
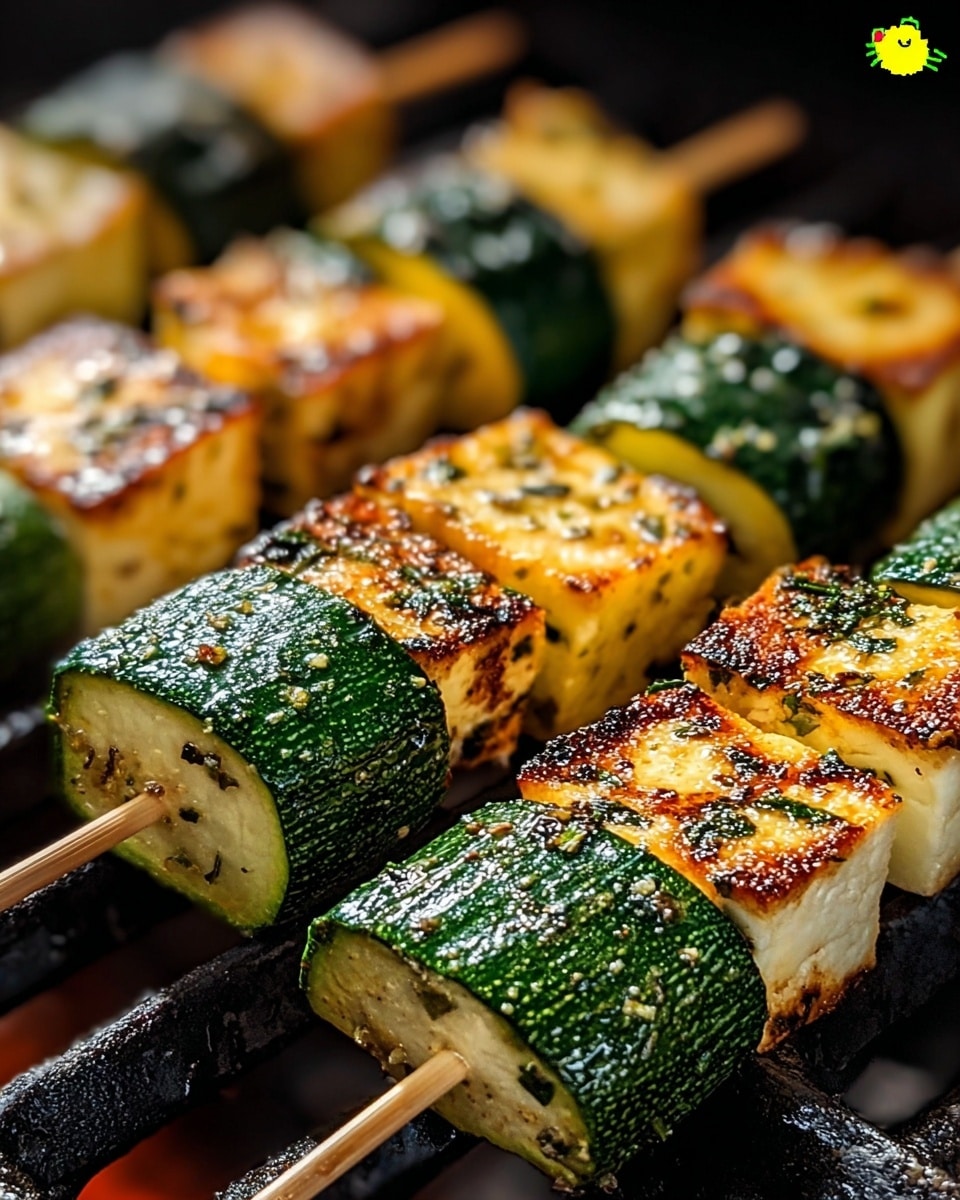
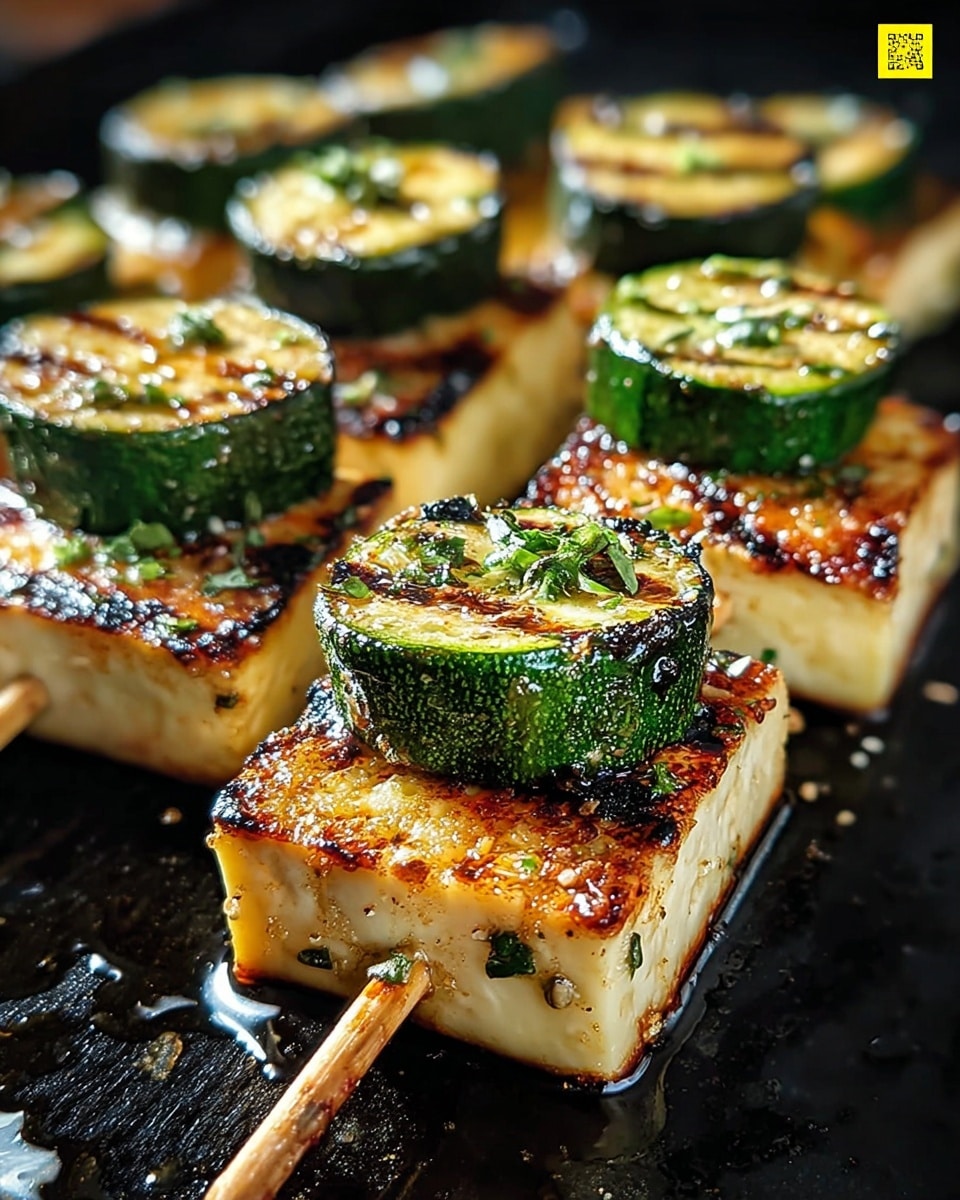
Garlic Butter Zucchini Skewers are a simple, flavorful side dish perfect for grilling season. With tender zucchini slices coated in a fragrant garlic butter sauce, these skewers are sure to be a hit at your next barbecue or weeknight dinner.
Ingredients
- 2 medium zucchinis, sliced
- 4 cloves garlic, minced
- 4 tbsp unsalted butter
- 2 tbsp extra virgin olive oil
- ½ tsp salt
- ¼ tsp freshly ground black pepper
- 1 tbsp fresh lemon juice
Instructions
- Step 1: Wash and slice zucchinis into thick rounds or half-moons for even cooking.
- Step 2: In a small saucepan over low heat, melt the unsalted butter. Add minced garlic and simmer until fragrant.
- Step 3: In a large bowl, combine zucchini slices with olive oil, salt, pepper, and the garlic butter until well coated.
- Step 4: Thread the zucchini onto skewers. If using wooden skewers, soak them in water for at least 30 minutes to prevent burning.
- Step 5: Preheat the grill to medium-high heat (about 400°F). Grill the skewers for 8-10 minutes, turning occasionally until tender and charred.
- Step 6: Drizzle fresh lemon juice over the skewers before serving hot.
Tips & Variations
- For an extra layer of flavor, sprinkle fresh herbs like parsley or thyme over the skewers before serving.
- Try adding cherry tomatoes or bell pepper pieces to the skewers for a colorful and tasty mix.
- If you don’t have a grill, you can cook the skewers under a broiler or on a grill pan indoors.
Storage
Store any leftover zucchini skewers in an airtight container in the refrigerator for up to 2 days. Reheat gently in a skillet or oven to maintain tenderness and flavor. Avoid microwaving as it can make the zucchini soggy.
How to Serve
Serve this delicious recipe with your favorite sides.
FAQs
Can I use frozen zucchini for this recipe?
Fresh zucchini is best for grilling as frozen zucchini tends to release excess moisture and can become mushy.
How do I prevent the zucchini from falling off the skewers while grilling?
Cut the zucchini into thick, firm slices and thread them snugly on the skewers. Soaking wooden skewers in water helps keep them sturdy and prevents burning.
PrintGarlic Butter Zucchini Skewers Recipe

These Garlic Butter Zucchini Skewers are a simple yet flavorful side dish perfect for grilling season. Tender zucchini slices are coated in a rich garlic butter and olive oil mixture, then grilled to perfection with delightful char marks. Finished with a splash of fresh lemon juice, these skewers offer a delicious balance of savory and tangy flavors that complement any meal.
- Prep Time: 10 minutes
- Cook Time: 10 minutes
- Total Time: 20 minutes
- Yield: 4 servings 1x
- Category: Side Dish
- Method: Grilling
- Cuisine: American
- Diet: Low Fat
Ingredients
Vegetables
- 2 medium zucchinis, sliced into thick rounds or half-moons
Seasonings and Sauce
- 4 cloves garlic, minced
- 4 tbsp unsalted butter
- 2 tbsp extra virgin olive oil
- ½ tsp salt
- ¼ tsp freshly ground black pepper
- 1 tbsp fresh lemon juice
Instructions
- Prepare the Zucchini: Wash the zucchinis thoroughly and slice them into thick rounds or half-moons to ensure even cooking on the grill.
- Make Garlic Butter: In a small saucepan set over low heat, melt the unsalted butter gently. Add the minced garlic to the melted butter and simmer for a few minutes until the garlic becomes fragrant, infusing the butter with flavor.
- Combine Ingredients: Transfer the sliced zucchini to a large bowl. Add the extra virgin olive oil, salt, black pepper, and the prepared garlic butter. Toss everything together until the zucchini slices are evenly coated with the mixture.
- Skewer the Zucchini: If using wooden skewers, soak them in water for at least 30 minutes to prevent burning. Thread the coated zucchini slices onto the skewers, making sure they are secure and evenly spaced.
- Grill the Skewers: Preheat your grill to medium-high heat, approximately 400°F. Place the zucchini skewers onto the grill grate and cook for 8-10 minutes, turning occasionally. Grill until the zucchini is tender and shows attractive char marks.
- Finish and Serve: Remove the skewers from the grill and drizzle fresh lemon juice over the top while still hot. Serve immediately for a delicious and vibrant side dish.
Notes
- Soaking wooden skewers before grilling prevents them from burning or catching fire.
- For added flavor, sprinkle chopped fresh herbs like parsley or basil on the finished skewers.
- These skewers can be made vegetarian by using plant-based butter.
- Adjust grilling time based on the thickness of the zucchini slices to avoid overcooking.
- Can easily be doubled or tripled for larger gatherings.
Keywords: garlic butter zucchini skewers, grilled zucchini, easy side dish, summer grilling, vegetable skewers